


Contents
- What is NPM
- Generating Angular Workspace
- Installing Angular Library
- Adding Custom code into the files
- Building the library
- Testing it by including it into the application
- Packing the library
- Npm Login and Publish
- Surprise! Surprise!
Prerequisite: Node & NPM & Angular had to be installed before proceeding.
Let's start by understanding NPM📦
Node.js makes it possible to write applications in JavaScript on the server. It’s built on the V8 JavaScript runtime and written in C++ — so it’s fast. Originally, it was intended as a server environment for applications, but developers started using it to create tools to aid them in local task automation. Since then, a whole new ecosystem of Node-based tools (such as Grunt, Gulp, and webpack) has evolved to transform the face of front-end development. And to make use of these tools (or packages) in Node.js, we need to be able to install and manage them in a useful way. This is where npm, the Node package manager, comes in.
Generating Angular Workspace😎
Now we will install a new workspace by using angular CLI. Here we can generate our workspace in two ways.
- By simple ng new command.
- By using --create-application=false flag along with ng new command.
In simple ng new command, the Angular application with normal workspace will generate having src, public directories, and its other configuration files & By setting --create-application=false flag this tell ng new not to create the initial Angular application in the Workspace.
In this tutorial, we are going to create a workspace by using the normal ng new command.

Installing Angular Library😄
After installing the workspace, we will install the angular library.

Pro-tip: Before generating a library first ensure its name should be unique. According to npm guildelines or it will generate an error while publishing the library with the same name.
After installing it will generate an src directory along with configuration files within Project Directory.
Pro-tip: Here we can use the --prefix flag in the library generating command if we want our library components to be distinct. If we don’t, Angular CLI will use lib by default.
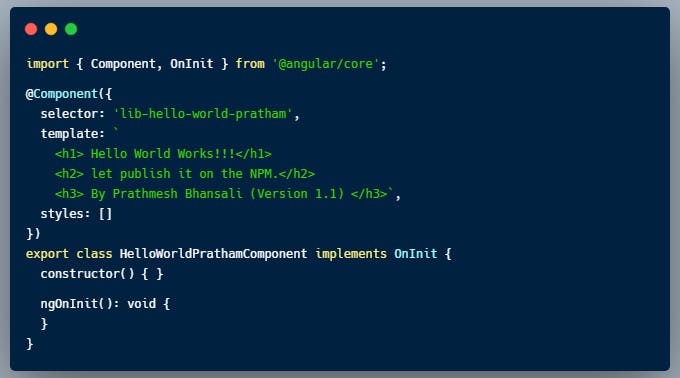
Adding Custom code into the files😮
Now we will add our custom code in the hello-world-pratham.component.ts file which is present inside the lib folder.
Building the library😍
After this, we will build our library by using the following command.

Notice: Here we have used the --prod flag along with the build command to escape from Ivy Error which occurs while publishing library to NPM.
After generating the build our library is ready to use and as a safer side before publishing, we will test it in our angular workspace (which we have generated in section 2)
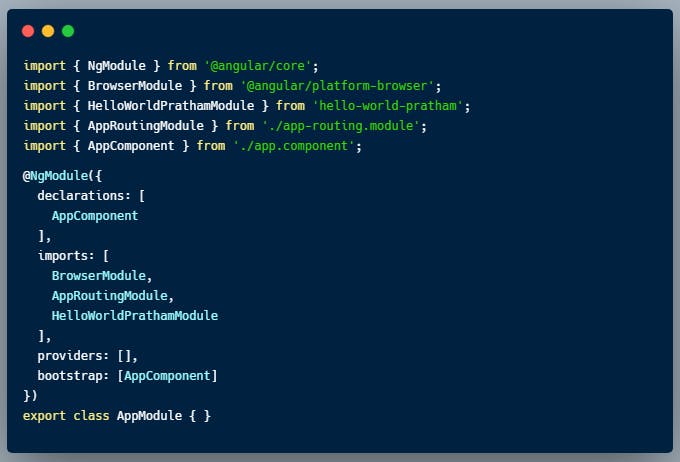
Testing the library by importing😲
First, we will import our module in the app.module.ts file,
And after importing, we will move to app.component.html, here we will add the following code.

And After Running ng serve command in the root. Our application server will live at localhost:4200. And we will get the following output.
 This will generate directory name as dist at the root of our application
Packaging Our Library🤗
Here Packaging our library means taking the generated build files and creating a single tgz file that we can share either manually or host on npm. Now we will pack our files using the following command at the root of our application by going into the dist\hello-world-pratham directory.

Here we can see tgz file is generated having the name of our library along with its version.
Logging and publishing into NPM🤩
If you are new to NPM, then register on NPM first before proceeding further.
Now we have to login into our NPM account.

Pro-tip: We can also provide a version to our library by running the version command.

After getting successful login, we will further and publish our library using the following command.

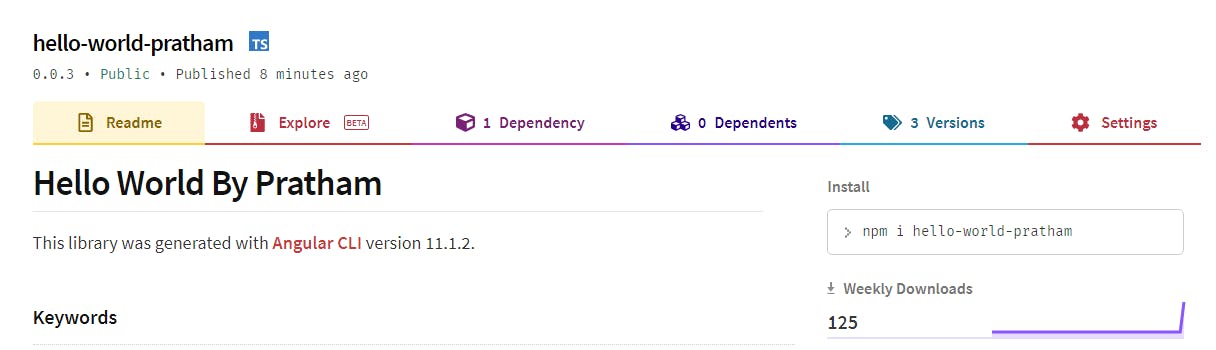
Finally, our library is published on NPM. Now we can log in to our npm account through the browser.
And with that, it's a wrap! I hope you found the article useful😃! If this is something that interests you, please share the article with your friends and connections🤝. You can also subscribe to my newsletter to get updates every time I write something!📝
Surprise !! Surprise !! 🤑
As we have seen we have to build our library before using it. And thus building it multiple times and then starting our server to see the changes could be a hectic task. Thus there is one more command by which we can hot reload our library to see the changes.
 And thus by running the above command in one terminal and ng server in the second terminal we can see the changes instantaneously.
Thank you for reading😊, If you have reached so far, please like the article ❤️, It will encourage me to write more such articles. Do share your valuable suggestions, I appreciate your honest feedback!
NPM Library : npmjs.com/package/hello-world-pratham